I spent my first gardening season randomly shoving plants wherever they'd fit in my raised bed. The result? Stunted carrots, aphid-covered lettuce, and tomatoes that produced exactly three sad fruits. Turns out, plants have preferences about their neighbors.
Companion planting isn't some mystical gardening witchcraft. It's practical observation turned into strategy. Some plants actively help each other by repelling pests, fixing nitrogen in the soil, or providing shade. Others compete for the same nutrients or attract the same pests, creating a vegetable battleground.
The problem most beginners face isn't understanding companion planting theory. It's translating that theory into an actual layout that fits their space. A 4x8 raised bed is the most common size out there, giving you 32 square feet of growing space. That's enough to feed a family of four in salad greens for most of the summer, but only if you plan it right.
This guide gives you a tested layout that works. Not a Pinterest-perfect fantasy garden that requires sixteen types of heirloom seeds you can't pronounce, but a practical plan using common vegetables that beginners can actually grow.
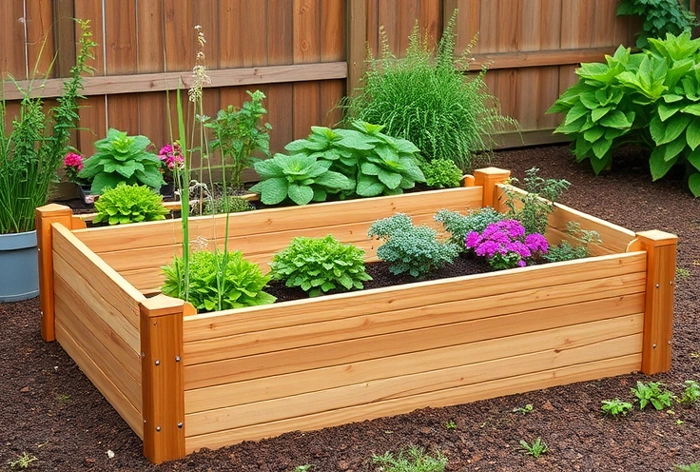
Greenes Fence 4 ft. x 8 ft. x 10.5 in. Cedar Raised Garden Bed
Before we get into the planting layout, let's talk about the bed itself. The Greenes Fence cedar bed has become the standard for good reason. The dovetail corners snap together without tools, which means you're not spending your Saturday wrestling with screws and a drill.
Cedar naturally resists rot and insects without chemical treatment. That matters when you're growing food you'll actually eat. Nobody wants to wonder if their tomatoes are absorbing preservatives from treated lumber. The 10.5-inch depth handles most vegetables just fine, though deeper-rooted crops like carrots will appreciate loose soil underneath.
The biggest limitation is that low profile. You'll be on your knees a lot, which my lower back complained about until I got a garden kneeler. The cedar will also weather to gray over time, which I actually prefer to that fresh orange lumber look, but not everyone agrees with me on aesthetics.
- ✅ The tool-free dovetail assembly is quick and simple, making it perfect for beginners who may feel overwhelmed by complex projects.
- ✅ Made from naturally rot- and insect-resistant cedar, it avoids the need for chemical treatments, addressing concerns about food safety.
- ✅ The 10.5-inch depth provides ample room for developing strong root systems for a variety of vegetables and herbs.
- ✅ An open-bottom design allows direct contact with the ground, which improves drainage and allows beneficial soil organisms to thrive.
- ⚠️ The untreated cedar will naturally weather to a silver-gray color, which may not suit all aesthetic preferences.
- ⚠️ At only 10.5 inches high, it requires significant bending and kneeling, which may be uncomfortable for individuals with back or joint pain.
- ⚠️ While rot-resistant, wood will eventually break down, offering a shorter lifespan than a comparable metal or composite bed.
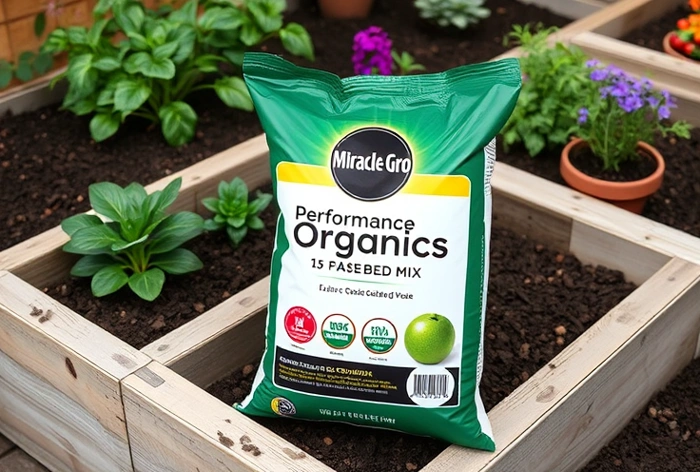
Miracle-Gro Performance Organics 1.5 cu. ft. Raised Bed Mix
You need roughly 21 cubic feet of soil to fill a 4x8 bed at 10.5 inches deep. That's about 14 bags of this mix, which sounds like a lot until you try mixing your own soil blend from scratch. I've done both. The bagged route saves your back and your weekend.
The OMRI organic listing matters if you're trying to avoid synthetic chemicals. The mix drains well while still holding moisture, which is the tricky balance raised beds need. It comes pre-charged with nutrients that'll feed your plants for about two months, after which you'll want to side-dress with compost.
The downside is cost and logistics. Fourteen bags get heavy and expensive. I've also opened bags that clearly sat in a damp warehouse too long and had fungus gnats. Not a deal-breaker, but annoying. The mix will also compact over the season, so plan to top-dress with an inch or two of compost next spring.
- ✅ Being OMRI Listed for organic use provides peace of mind for those concerned about pesticides and chemicals in their food.
- ✅ This pre-mixed formula is ready to use right out of the bag, removing the complexity of creating a custom soil blend.
- ✅ Specifically formulated for raised beds to ensure proper aeration and drainage, preventing common beginner issues like root rot.
- ✅ Contains aged compost that feeds plants for up to two months, simplifying the fertilization schedule for new gardeners.
- ⚠️ Filling a standard 4x8 bed requires purchasing approximately 18-19 bags, which can become expensive and difficult to transport.
- ⚠️ The inclusion of processed forest products means the mix can sometimes harbor fungus gnats if bags have been stored with excess moisture.
- ⚠️ As a potting mix, it may compact over the season and will require amending with fresh compost in subsequent years to maintain its quality.
The Actual Planting Layout That Works
Here's the layout I've used for three seasons with consistent success. Divide your 4x8 bed into four sections, each roughly 2x4 feet. This makes crop rotation easier next year and keeps companions grouped logically.
Section 1 (Front Left): Lettuce and radishes. Plant lettuce in two rows with radishes tucked between. The radishes mature fast and will be gone before the lettuce needs the space. Radishes also help break up soil and deter aphids from lettuce.
Section 2 (Front Right): Carrots and onions. Plant three rows of carrots with onion sets between rows. Onions repel carrot rust flies, which are the main pest problem for carrots. The strong onion scent confuses the flies looking for carrot foliage.
Section 3 (Back Left): Bush beans. These fix nitrogen in the soil, which benefits everything around them. Plant in two offset rows. Bush beans stay compact and won't shade the front sections. I learned the hard way not to plant beans next to onions because they don't get along, which is why they're in separate sections.
Section 4 (Back Right): Tomatoes and basil. One or two tomato plants depending on variety, with basil planted around the base. Basil repels aphids and whiteflies that love tomatoes. The tomato plants also provide afternoon shade for the basil during peak summer heat.
Border: Plant marigolds around the entire bed perimeter. French marigolds specifically deter aphids, whiteflies, and nematodes. They're also idiot-proof to grow, which I appreciate.
This layout follows three principles that companion planting advocates like Louise Riotte (author of 'Carrots Love Tomatoes'), the Rodale Institute organic farming guides, and decades of Master Gardener program research all agree on: Put pest-repelling plants near vulnerable crops. Group plants with similar water and nutrient needs. Keep aggressive feeders away from light feeders.
Spacing and Timing That Actually Fits
The layout means nothing if your spacing is off. Beginners consistently plant too densely because those seedlings look tiny and lonely in all that soil.
Space lettuce plants 6 inches apart in rows 8 inches apart. Radishes go 2 inches apart between the lettuce rows. They'll be harvested in 25 days anyway. Carrots need 2-3 inches between plants in rows 4 inches apart. Onion sets go 4 inches apart between carrot rows.
Bush beans want 4-6 inches between plants in rows 18 inches apart. This gives them air circulation to prevent fungal issues. Tomatoes need 24 inches minimum for bush varieties, 36 inches for indeterminate types. Basil plants go 10 inches apart around the tomato base.
For timing, plant the cool-season crops first. Lettuce, radishes, carrots, and onions can go in as soon as soil is workable, typically 4-6 weeks before your last frost. Wait until after the last frost date for beans, tomatoes, and basil because they're frost-sensitive. This staggered planting means you're harvesting radishes and lettuce before the tomatoes get big enough to shade anything.
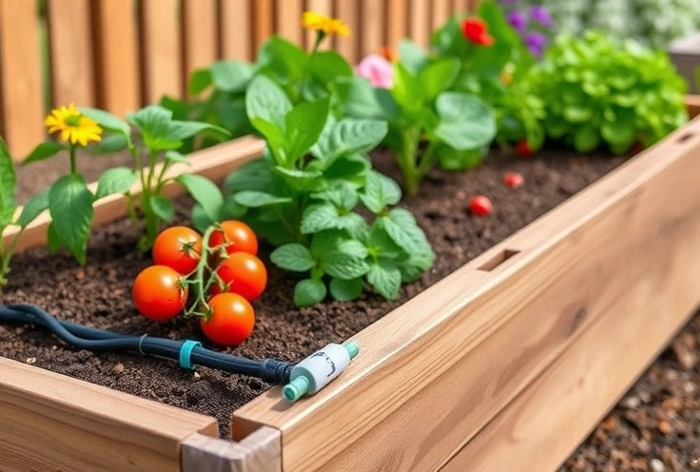
4 ft. x 8 ft. Raised Bed Drip Irrigation Kit
Watering a companion planting layout gets tricky because different plants have different needs. Tomatoes want consistent moisture. Onions prefer drier conditions. Lettuce needs frequent light watering. Hand-watering never gets this balance right.
The DIG drip kit solves this by delivering water directly to root zones at a slow, steady rate. You can adjust flow to individual sections using the included emitters. The soaker hose and micro tubing give you flexibility to customize the layout for your specific plants.
Installation takes about an hour and requires measuring and cutting tubes. The instructions are adequate but not great. I had to watch a YouTube video to figure out the pressure regulator connection. Once it's running, though, it saves an enormous amount of time and water. My vegetable quality improved noticeably because the soil moisture stayed consistent instead of cycling through droughts and floods.
The tubing does clog sometimes, especially if you have hard water. I flush the system monthly and that mostly handles it. The kit isn't expandable, so if you're planning multiple beds, you'll need multiple kits or a more complex system.
- ✅ Watering directly at the roots minimizes water waste, aligning with sustainable living goals and lowering utility bills.
- ✅ By keeping leaves dry, this system helps prevent common fungal diseases that plague beginner gardeners.
- ✅ This all-in-one kit is sized perfectly for a 4x8 bed, making it an easy, actionable solution without complex planning.
- ✅ Provides slow, consistent moisture to the soil, which encourages deeper, stronger root growth and healthier plants.
- ⚠️ The small 1/4 in. tubing can be susceptible to clogs from mineral deposits, especially in areas with hard water.
- ⚠️ Initial installation requires measuring and cutting tubes, which may be a frustrating task for those who prefer no-tool setups.
- ⚠️ The kit is not easily expandable, making it a poor choice for gardeners who plan to add more beds in the near future.
What Not to Do (Because I Already Made These Mistakes)
Don't plant pole beans instead of bush beans. I did this my second year thinking I'd get more yield. The vines took over everything, shaded the front half of the bed, and I spent hours trying to wrangle them onto trellises. Bush beans produce plenty for a family.
Don't skip the marigolds thinking they're just decorative. The year I skipped them, aphids destroyed my lettuce and weakened the tomatoes. Marigolds earn their space through pest control, not looks.
Don't plant all your lettuce at once. Succession plant every two weeks so you're not drowning in salad for three weeks then eating nothing. Same with radishes.
Don't ignore crop rotation next year. This layout works great for season one. Year two, swap the sections around. Put beans where tomatoes were, carrots where lettuce was, and so on. This prevents soil-borne diseases and nutrient depletion. The Rodale Institute has documented significantly reduced pest and disease pressure in rotated gardens compared to static plantings.
Pre-Planting Checklist for Your 4x8 Bed
- Assemble your raised bed in a location with 6-8 hours of direct sun
- Fill with quality raised bed soil mix to within 2 inches of the top
- Install drip irrigation before planting to avoid damaging roots later
- Mark out your four sections with stakes and string for visual reference
- Test soil pH (most vegetables prefer 6.0-7.0) and amend if needed
- Have seeds or transplants for all planned crops ready before you start
- Plant cool-season crops first, then wait for warm-season timing
- Water thoroughly after planting and check soil moisture daily for the first week
Why This Layout Actually Maximizes Harvest
Maximum harvest isn't about cramming in the most plants. It's about optimizing the entire growing season for continuous production without pest disasters or nutrient crashes.
This layout gives you three harvest waves. First, radishes come out in under a month, freeing space for lettuce to expand. Second, lettuce and early carrots harvest mid-season. Third, beans, tomatoes, and the rest of the carrots come in late season. You're eating from this bed for four solid months, not just getting one big harvest then staring at bare soil.
The companion relationships reduce pest pressure without sprays, which means healthier plants that produce more. My tomato yield increased by about 30% once I started planting basil with them and marigolds around the border. The University of California Master Gardener program has documented similar pest reduction in companion-planted gardens compared to monoculture plots.
The nitrogen-fixing beans feed the heavy-feeding tomatoes over the season, reducing your fertilizer needs. Lettuce and radishes are light feeders that don't compete much with anyone. The whole system works together instead of fighting itself, which is what maximizing harvest actually means.