Starting seeds indoors for the first time can feel like stepping into unfamiliar territory, especially if you're not sure when to start, what equipment you actually need, or how to keep tiny seedlings alive long enough to transplant. This guide is written for gardeners who have never started seeds indoors before and want clear, practical answers without wading through advanced techniques or assumptions about prior experience.
You might be feeling uncertain about whether you need grow lights, how much space the setup will take, or what happens if you start too early or too late. Those concerns are normal. The good news is that indoor seed starting doesn't require a greenhouse or expensive infrastructure - just a few thoughtful decisions and a willingness to learn as you go.
We'll walk through the timing, the basic supplies that make a real difference, common mistakes that trip up beginners, and how to recognize when your seedlings are ready for the garden. By the end, you'll have a clearer picture of what to expect and the confidence to start your first tray of seeds without second-guessing every step.
Why Start Seeds Indoors?
Starting seeds indoors extends your growing season by weeks or even months, giving plants a head start before the last frost passes. In regions with short summers, this extra time can be the difference between ripe tomatoes in August and green ones still clinging to the vine in October.
You also gain access to a much wider variety of plants than what's available at local nurseries. Heirloom tomatoes, specialty peppers, and unusual greens are easy to start from seed but rarely stocked as transplants. Seed packets cost a fraction of what you'd pay for starter plants, and a single packet often provides enough plants for your entire garden plus extras to share.
Growing from seed gives you control over plant health from day one. You choose the soil, avoid transplant shock from nursery conditions, and ensure seedlings aren't exposed to pesticides or diseases before they reach your garden. This control is especially valuable for organic homesteaders who want to know exactly what their plants have been exposed to.
Indoor seed starting also lets you time plantings precisely for your climate and garden plan, rather than relying on whatever happens to be available when you visit the store. You decide when each crop begins, which helps stagger harvests and make the most of limited space.
The Four Things That Matter Most
Seedlings depend on four basic conditions to grow from seed to transplant-ready plant: light, warmth, moisture, and air circulation. When one of these is missing or inconsistent, seedlings show it quickly - stretching toward windows, damping off at the soil line, or stalling out before they develop true leaves.
Light drives photosynthesis and keeps stems compact. Without enough of it, seedlings stretch tall and thin as they search for more, a condition called legginess. South-facing windows help, but most indoor spots deliver only a fraction of the intensity seedlings prefer. Supplemental grow lights placed two to four inches above the tray fill that gap and let you control the daily duration, typically 14 to 16 hours for most vegetables and flowers.
Warmth affects germination speed and root development. Most seeds sprout fastest when soil temperature sits between 65 and 75°F, though heat-lovers like tomatoes and peppers prefer the upper end of that range. Once seedlings emerge, they tolerate slightly cooler air, but cold drafts or unheated basements slow growth and increase disease risk. A simple seedling heat mat under the tray maintains consistent bottom warmth until the first leaves appear.
Moisture needs to stay even - not soaking, not bone-dry. Seeds require constant contact with damp soil to germinate, and young roots dry out in minutes if the surface crusts over. Over-watering, however, starves roots of oxygen and invites fungal diseases like damping-off. Bottom-watering through drainage trays or misting the surface with a spray bottle both work; the goal is to keep the top half-inch of soil consistently moist to the touch.
Air circulation strengthens stems and prevents fungal problems. Stagnant air around seedlings keeps humidity high and encourages mold on soil and leaves. A small fan set on low, oscillating across the trays for a few hours each day, mimics outdoor breezes and helps stems develop the sturdy cell structure they'll need when you move them outside. The movement also dries surface moisture between waterings, cutting down on disease pressure.
When all four conditions align, seedlings grow steadily, with thick stems, dark green leaves, and root systems that fill their cells before transplant time. Miss one, and you'll spend the season trying to catch up.
Timing: When to Start Your Seeds
Knowing when to start your seeds indoors prevents leggy, overgrown seedlings and helps you time transplants for safe outdoor planting. The key is to count backward from your area's average last spring frost date, which you can find through your local extension office or garden center. Most seed packets print the recommended indoor start time as a range of weeks before the last frost, and following that guidance is more reliable than guessing based on calendar dates alone.
Tomatoes typically need 6 to 8 weeks indoors before transplanting, while peppers require 8 to 10 weeks due to slower germination and growth. Cool-season crops like broccoli and cabbage start 4 to 6 weeks early, and fast growers like cucumbers and squash need only 3 to 4 weeks. Starting too early leaves you with root-bound plants that struggle after transplant; starting too late means smaller harvests or fruit that doesn't ripen before fall frost.
Mark your last frost date on a calendar, then work backward using the seed packet instructions for each variety you plan to grow. If you're starting multiple crops, create a simple chart listing each plant, its indoor start date, and expected transplant week. This approach keeps you organized and ensures every seedling gets the right amount of indoor time before moving outside.
Light: The Biggest Factor in Success
Light is the single most important factor when starting seeds indoors. Without enough of it, seedlings stretch tall and thin - a condition called legginess - as they desperately reach for any available source. Leggy seedlings have weak, spindly stems that struggle to support leaves and often topple over or fail to thrive once transplanted outdoors.
Window light alone is rarely sufficient, even on a south-facing sill. Winter and early spring sunlight is too weak and inconsistent, and glass filters out wavelengths seedlings need. Most seeds require 12 to 16 hours of bright, direct light each day to grow compact and sturdy.
Grow lights provide the intensity and duration seedlings need. Position the light source 2 to 4 inches above the tops of your seedlings and raise it as they grow to maintain that distance. Too far away, and the seedlings will stretch; too close, and heat can scorch tender leaves. Full-spectrum LED or fluorescent shop lights work well for beginners and consume less energy than older bulb types.
Watch your seedlings closely. If stems are thin and plants lean aggressively toward the light, move the fixture closer or increase daily hours. Compact, deep green growth with sturdy stems signals you have the balance right. Getting light right from day one sets the foundation for healthy transplants and a successful first season.
Common Mistakes to Avoid
Overwatering is the most common mistake when starting seeds indoors for the first time, causing seeds to rot or seedlings to develop damping off - a fungal disease that wilts stems at the soil line. Keep the growing medium consistently moist but not soggy, and always allow the surface to dry slightly between waterings. If you see fuzzy white mold on the soil or collapsing seedlings, reduce watering immediately and improve air circulation with a small fan.
Starting seeds too early leaves you with leggy, overgrown seedlings that struggle after transplant. Count backward from your last expected frost date using the seed packet's recommended indoor start time, typically six to eight weeks for tomatoes and peppers, three to four weeks for squash and cucumbers. If your seedlings outgrow their containers before outdoor conditions are safe, transplant them into slightly larger pots and continue providing strong light.
Using garden soil indoors introduces weed seeds, pests, and compaction that prevents delicate roots from establishing. Seed starting mix is sterile, lightweight, and drains well while holding moisture evenly. If you've already planted in garden soil and germination is poor, gently transplant emerged seedlings into fresh seed starting mix to give roots room to grow.
Insufficient light causes seedlings to stretch tall and weak as they search for energy. Window light is rarely enough, even on a south-facing sill. Position a grow light or shop light two to three inches above seedling tops and raise it as they grow, providing fourteen to sixteen hours of light daily. Compact, dark green leaves with short stems between leaf sets indicate your seedlings are receiving adequate light.
Skipping labels makes it impossible to identify which variety is which once multiple trays are growing. Write the variety name and planting date on each cell or pot immediately after sowing, using waterproof markers or plastic labels that won't fade under moisture and light. If you've already lost track, let seedlings develop their first true leaves - some varieties show distinct leaf shapes or colors that can help you narrow down the possibilities, though you may need to wait until fruiting to confirm.
Final Takeaway
Seed starting is a learn-as-you-go process, and your first season will teach you more than any guide can cover. Mistakes like overwatering, stretching seedlings, or uneven germination are normal - they're how you learn what works in your space, with your schedule, and with the varieties you choose. Every grower has lost a tray or two along the way, and those early missteps become the foundation for stronger skills the next time around.
Start small rather than planting dozens of varieties at once. A manageable number of trays lets you observe daily, adjust conditions when something looks off, and build confidence without feeling overwhelmed. Pay attention to what your seedlings are telling you: pale leaves often signal weak light, long stems mean they're stretching, and damping-off happens when soil stays too wet. Each observation sharpens your ability to respond quickly the next time.
Keep notes on what you planted, when you started, and how each variety performed. Simple records - seed variety, start date, transplant date, and any issues - turn your first season into a reference guide for the years ahead. You'll remember which tomatoes handled hardening off well, which peppers were slow to germinate, and which timing gave you the healthiest starts.
Don't wait for perfect conditions or perfect knowledge. The best way to learn seed starting is to fill a tray, plant a few seeds, and watch what happens. You'll make adjustments, refine your setup, and grow more capable with every season. Take the first step, trust the process, and know that each seedling you raise brings you closer to the garden you're working toward.
What You'll Actually Need
- Containers with drainage holes (trays, pots, or pellets)
- Seed starting mix (not garden soil)
- Seeds suited to your growing zone
- Light source (window or grow light)
- Warmth source if your home is cool
- Humidity dome or plastic cover
Your First Seed Starting Checklist
- Check your last frost date
- Count back the right number of weeks for each crop
- Gather containers, seed mix, and labels
- Set up light source and warmth if needed
- Plant seeds at correct depth (usually 2x seed width)
- Mist soil and cover with dome or plastic
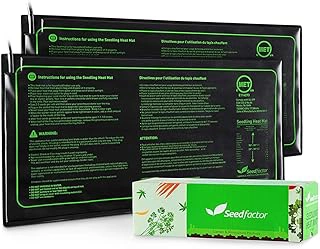
Seedfactor Hydroponic Seedling Heat Mat 2-Pack
Consistent warmth speeds up germination, especially if your home stays cool or you're starting heat-loving crops like peppers, tomatoes, or eggplants. The Seedfactor Hydroponic Seedling Heat Mat 2-Pack provides a simple way to raise soil temperature without complicated controls, making it approachable for first-time seed starters.
Each mat in this two-pack sits under your seed trays and radiates gentle, steady heat. This setup works well if you're starting multiple batches at once or want to stagger plantings across different trays. The mats don't include a thermostat, so they run continuously once plugged in - ideal for beginners who prefer straightforward plug-and-play operation without extra settings to manage.
This option fits best if your indoor space regularly dips below multiple°F or you're working with crops that germinate faster in warmer soil. The two-pack value lets you cover more trays or experiment with different seed varieties side by side. For spaces that stay naturally warm or seeds that germinate well at room temperature, heat mats may not be necessary.
At $18.99, this set offers an affordable entry point into bottom heat without requiring separate purchases for each tray. If you're starting peppers and tomatoes in a basement or unheated room, the consistent warmth can make a noticeable difference in how quickly seeds sprout and how evenly they emerge.
- ✅ Two-pack provides coverage for multiple trays or staggered plantings
- ✅ Simple plug-in operation with no controls to adjust
- ✅ Affordable at $18.99 for the pair
- ✅ Steady warmth helps heat-loving seeds germinate faster
- ⚠️ No thermostat or temperature control included
- ⚠️ Runs continuously when plugged in, requiring manual on/off management
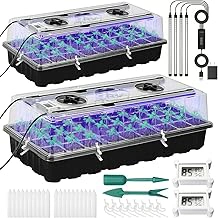
Yioviru 72-Cell Seed Starter Tray with Grow Light & Humidity Dome
If you don't have a sunny south-facing window or worry about juggling multiple purchases, the Yioviru 72-Cell Seed Starter Tray with Grow Light & Humidity Dome bundles the three essential tools - cells, light, and humidity control - into one package. The built-in grow light means you can place the tray on a kitchen counter, basement shelf, or anywhere else without second-guessing whether your seedlings will stretch and weaken from poor light. The humidity dome helps hold moisture around germinating seeds, reducing the number of times you need to check and mist each day.
With multipledividual cells, this tray gives you room to start several varieties at once or share extras with neighbors and gardening friends. Each cell is small enough to fit most vegetable and flower seeds, and the compartmentalized design keeps roots from tangling when it's time to transplant. The 4.7/5 rating reflects solid user feedback, and at $35.99 the kit removes the guesswork of buying a light, dome, and tray separately.
Because everything arrives together, setup is faster than assembling separate components, which can help beginners get seeds started on schedule instead of waiting for backorders or debating which light fits which tray. The tradeoff is less flexibility - you can't swap out the light for a different spectrum or upgrade the dome independently - but for a first season, convenience often outweighs customization. If you lack bright window space or simply want everything in one purchase, this all-in-one starter kit offers a straightforward path from seed packet to sturdy seedling.
Check current price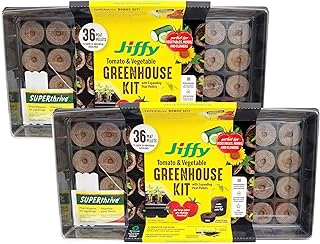
Ferry Morse Jiffy Tomato & Vegetable Seed Starter Kit, 72 Peat Pellets
Peat pellets simplify the indoor seed-starting process by eliminating the need to measure, mix, or handle loose soil. The Ferry Morse Jiffy Tomato & Vegetable Seed Starter Kit includes 72 compressed peat pellets that expand when watered, creating individual planting cells that hold moisture and provide a stable growing medium for tomato and vegetable seedlings.
Each pellet is enclosed in a biodegradable mesh netting, so when seedlings are ready, you can transplant the entire pellet directly into the garden or a larger container without disturbing roots. This kit is designed for beginners who want a clean, straightforward setup - no bags of potting mix to store, no measuring, and minimal cleanup. The pellets arrive dry and flat, expand to full size with warm water, and are ready to plant within minutes.
Compared to loose seed-starting mix, peat pellets offer convenience and consistency but less flexibility in container choice. You're working with a fixed pellet size, which suits most tomato and vegetable seedlings but may feel limiting if you prefer custom cell depths or reusable trays. The pellets hold moisture well, though they can dry out faster than deeper soil cells if watering isn't consistent.
This kit works best if you value simplicity and want to avoid handling soil indoors. The 72-pellet count provides enough capacity for a typical beginner's first round of tomatoes, peppers, or other vegetables, and the uniform structure makes it easy to track watering and growth across all seedlings.
- ✅ No mixing or measuring - pellets expand with water and are ready to plant
- ✅ Biodegradable netting allows direct transplanting without root disturbance
- ✅ Clean setup with minimal mess indoors
- ✅ 72 pellets provide enough capacity for a typical beginner vegetable garden
- ⚠️ Fixed pellet size limits flexibility compared to custom-depth trays
- ⚠️ Can dry out faster than deeper soil cells if not monitored regularly

J4REFILL Peat Pellets, for 25 Plants
When you're testing a few varieties for the first time or refilling an existing tray, buying large quantities makes little sense. The J4REFILL Peat Pellets, for 25 Plants, offers an affordable entry point at $8.35, letting you start small without committing to bulk.
These compressed peat pellets expand when moistened, giving you a self-contained growing medium for each seedling. For beginners trying two or three vegetable types, 25 pellets is often enough to cover initial experiments while keeping upfront costs low. The 4.6 out of 5 rating reflects general satisfaction, and the pellet format means no mixing soil or filling individual cells - just add water and plant.
Because this is a refill product, you'll need a compatible tray to hold the pellets as they expand and support seedlings during early growth. If you already own a standard seed-starting tray, these pellets drop in easily. If not, pair them with a basic humidity-dome tray for stable moisture.
The compressed format also keeps storage simple - pellets take up minimal shelf space until you're ready to use them. For first-time growers unsure how many plants they'll actually transplant, starting with multipleets you learn watering rhythm, light distance, and timing before scaling to larger batches.
This size works well for small-scale trials, refilling portions of a larger setup, or urban gardeners with limited space. If your first season goes well, you can reorder or move to a higher-quantity option next year.
Check current price